By Koi Beauty | 05 January 2018 | 2096 Comments
How to Use a Home Microneedling Device
Professional skin needling has recently been linked to reducing signs of aging as well as removing acne scars. Typically this treatment is performed by a medical aesthetician, nurse, or physician. There are, however, a host of at-home microneedling devices which are much more cost effective than professional treatment. At-home microneedling uses shorter needles and can effectively help to reduce pore size, oil production, and fine lines. In order to use an at-home microneedling pen you should choose an appropriate device, read all instructions, sanitize the device, carefully glide it over your skin, and clean and store the device properly following treatment.
Shop for a microneedling device online.
These devices range in price from about $50 for a derma roller to upwards of $200 for a derma pen.

2. Determine the length of the needles. Most at home microneedling is performed using much shorter needles than those used by aestheticians. For instance, at a clinic needles can range in length from 0.5mm to 3mm depending on the type of treatment. When performing the treatment at home, you should use shorter needles. Needle lengths that range from 0.25mm to 1mm are recommended for general anti-aging procedures. If treating acne scars, you may want to use a longer needle around 1.5mm in length.
If you are opting for a longer needle, talk with your dermatologist prior to treatment.

3. Read all of the instructions. Before using a microneedling device, carefully read all of the instructions. The instructions will provide you with detailed information concerning set up, storage, and how to safely use the product. Each product is slightly different, so it is very important that you read the instructions that accompany the device you purchase.
Depending on the type of microneedling device you selected, you may have to insert the needle cartridge into the device as well as other minimal assembly that may be required.

4. Sanitize your microneedling device before use. Before you begin the treatment, sanitize the microneedling device. Place the device, needle side down, in a small bowl of rubbing alcohol. Leave the device immersed in the rubbing alcohol for at least one to two minutes.

5. Wash your face and remove makeup before use. Finally, before you begin the treatment, wash your face and remove all makeup. Wash your face using a gentle cleanser. This will help remove all dirt, grime, and makeup from the surface of your skin. You do not want any bacteria to get into the skin as a result of the microneedling process. As a result, you should always begin with a clean face.
Pat your face dry after washing.
Some people recommend applying a vitamin C serum to your face after it has been cleansed. This is meant to help the skin absorb enzymes and vitamins.
Part 2 Working an At-Home Microneedling Derma Roller, Derma Stamp, or Derma Pen

1. Visualize your face in sections. Mentally divide your face into approximately six sections. You do not need to actually mark your face. For example, you could try mentally dividing into the following sections: forehead, cheeks, chin, eye area, nose, and upper lip. This will help to ensure that you adequately cover the entire surface of your face and will help to break up the procedure.
If desired, you can also use a microneedling device on your neck and upper chest.
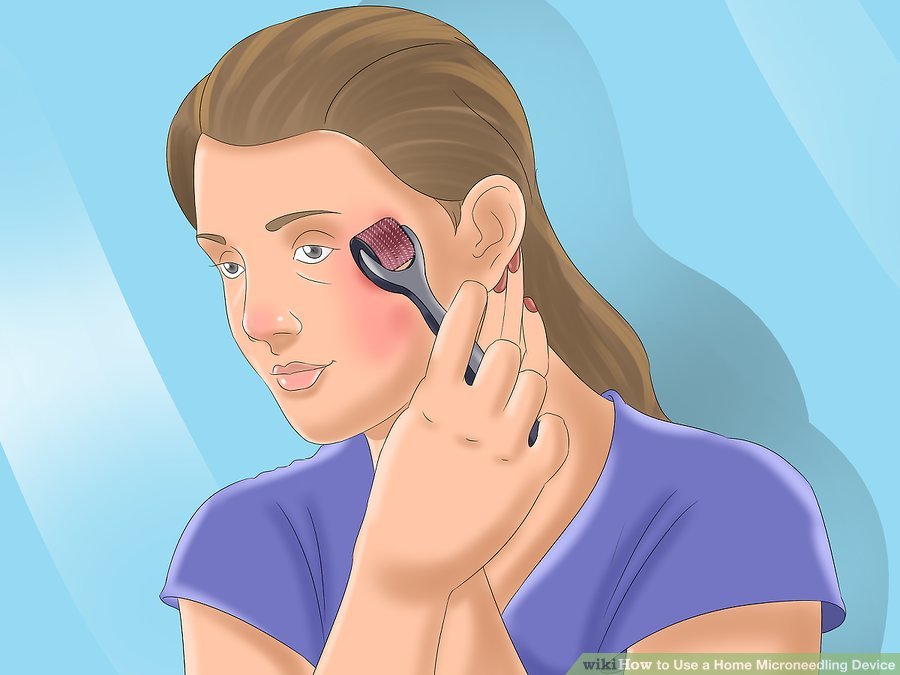
2. Glide the derma roller across your face. Turn on the device and gently glide the roller across your face. You should move the roller vertically, horizontally, and diagonally across the surface of your skin. This should be done in stripes covering each section of your face. While moving the roller across your face, use your other hand to pull your skin tight. This will make it easier to maneuver the device.
Do not go over the same section of skin too many times in one sitting. It is recommended that you do not pass over the same patch of skin more than ten times per treatment.

3. Do not apply too much pressure. When using the microneedling roller, stamp, or pen, do not apply too much pressure. Instead, you should apply light to moderate pressure. It may tingle or feel slightly uncomfortable at first, but it will not damage your skin and should not cause bleeding.

4. Lift the roller when changing directions. Always lift the roller completely off of your face when you are changing directions, then return it to your skin facing in the direction you are headed. Never drag or turn the microneedling roller from a vertical position to a diagonal position while it is still touching the surface of your skin. This could cause your skin to tear and may result in damage to your skin.
Part 3 Following an At-Home Microneedling Treatment

1. Do not wash your face for 6 to 8 hours following treatment. Although microneedling does not damage your skin, it will likely be red and tender immediately following the treatment. Allow your skin to rest and do not wash your face for at least six to eight hours.
Some individuals recommend applying a moisturizer or vitamin serum immediately following the procedure. Try this out and see what works best for your skin.
Avoid using makeup for 24 hours but make sure that you use sunblock.

2. Disinfect the microneedling device. Once you are finished using the device, rinse the needles under warm water and place it into a bowl of rubbing alcohol. This will disinfect the device of any bacteria that it may have picked up on the surface of the skin. It is very important that you keep the microneedling device clean and sanitary.
Do not share your microneedling device with other family members of friends. This should be considered a personal device.

3. Store the microneedling device in its original case. Following the cleansing process, store your microneedling device in its original case. This will help to ensure that the needles do not break or get damaged and will also keep the needles relatively clean between uses.
Part 1 Preparing for Microneedling at Home

1. Select a microneedling device. Prior to microneedling at home, you need to choose a device that is best suited for you. There are three different types of at home microneedling products: a derma roller, derma stamp, and derma pen. Derma rollers are the least expensive option and roll along your skin like a paint roller. Some dermatologists recommend derma stamps and derma pens because the vertical penetration is less painful and allows for easier maneuvering around the mouth, eyes, and nose.

1. Select a microneedling device. Prior to microneedling at home, you need to choose a device that is best suited for you. There are three different types of at home microneedling products: a derma roller, derma stamp, and derma pen. Derma rollers are the least expensive option and roll along your skin like a paint roller. Some dermatologists recommend derma stamps and derma pens because the vertical penetration is less painful and allows for easier maneuvering around the mouth, eyes, and nose.
Shop for a microneedling device online.
These devices range in price from about $50 for a derma roller to upwards of $200 for a derma pen.

2. Determine the length of the needles. Most at home microneedling is performed using much shorter needles than those used by aestheticians. For instance, at a clinic needles can range in length from 0.5mm to 3mm depending on the type of treatment. When performing the treatment at home, you should use shorter needles. Needle lengths that range from 0.25mm to 1mm are recommended for general anti-aging procedures. If treating acne scars, you may want to use a longer needle around 1.5mm in length.
If you are opting for a longer needle, talk with your dermatologist prior to treatment.

3. Read all of the instructions. Before using a microneedling device, carefully read all of the instructions. The instructions will provide you with detailed information concerning set up, storage, and how to safely use the product. Each product is slightly different, so it is very important that you read the instructions that accompany the device you purchase.
Depending on the type of microneedling device you selected, you may have to insert the needle cartridge into the device as well as other minimal assembly that may be required.

4. Sanitize your microneedling device before use. Before you begin the treatment, sanitize the microneedling device. Place the device, needle side down, in a small bowl of rubbing alcohol. Leave the device immersed in the rubbing alcohol for at least one to two minutes.

5. Wash your face and remove makeup before use. Finally, before you begin the treatment, wash your face and remove all makeup. Wash your face using a gentle cleanser. This will help remove all dirt, grime, and makeup from the surface of your skin. You do not want any bacteria to get into the skin as a result of the microneedling process. As a result, you should always begin with a clean face.
Pat your face dry after washing.
Some people recommend applying a vitamin C serum to your face after it has been cleansed. This is meant to help the skin absorb enzymes and vitamins.
Part 2 Working an At-Home Microneedling Derma Roller, Derma Stamp, or Derma Pen

1. Visualize your face in sections. Mentally divide your face into approximately six sections. You do not need to actually mark your face. For example, you could try mentally dividing into the following sections: forehead, cheeks, chin, eye area, nose, and upper lip. This will help to ensure that you adequately cover the entire surface of your face and will help to break up the procedure.
If desired, you can also use a microneedling device on your neck and upper chest.

2. Glide the derma roller across your face. Turn on the device and gently glide the roller across your face. You should move the roller vertically, horizontally, and diagonally across the surface of your skin. This should be done in stripes covering each section of your face. While moving the roller across your face, use your other hand to pull your skin tight. This will make it easier to maneuver the device.
Do not go over the same section of skin too many times in one sitting. It is recommended that you do not pass over the same patch of skin more than ten times per treatment.

3. Do not apply too much pressure. When using the microneedling roller, stamp, or pen, do not apply too much pressure. Instead, you should apply light to moderate pressure. It may tingle or feel slightly uncomfortable at first, but it will not damage your skin and should not cause bleeding.

4. Lift the roller when changing directions. Always lift the roller completely off of your face when you are changing directions, then return it to your skin facing in the direction you are headed. Never drag or turn the microneedling roller from a vertical position to a diagonal position while it is still touching the surface of your skin. This could cause your skin to tear and may result in damage to your skin.
Part 3 Following an At-Home Microneedling Treatment

1. Do not wash your face for 6 to 8 hours following treatment. Although microneedling does not damage your skin, it will likely be red and tender immediately following the treatment. Allow your skin to rest and do not wash your face for at least six to eight hours.
Some individuals recommend applying a moisturizer or vitamin serum immediately following the procedure. Try this out and see what works best for your skin.
Avoid using makeup for 24 hours but make sure that you use sunblock.

2. Disinfect the microneedling device. Once you are finished using the device, rinse the needles under warm water and place it into a bowl of rubbing alcohol. This will disinfect the device of any bacteria that it may have picked up on the surface of the skin. It is very important that you keep the microneedling device clean and sanitary.
Do not share your microneedling device with other family members of friends. This should be considered a personal device.

3. Store the microneedling device in its original case. Following the cleansing process, store your microneedling device in its original case. This will help to ensure that the needles do not break or get damaged and will also keep the needles relatively clean between uses.
Recently Reviews
Read MoreLeave a Reply
Your email address will not be published.Required fields are marked. *